Sepp Holzer ‘inspired’ earthworks event.
Post Type: Blog Post

Love is the fruit of marriage.
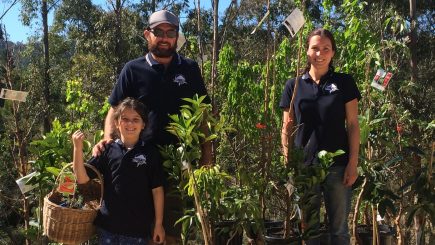
Just over 12 months ago we celebrated our wedding day surrounded by our Community of family and friends. We all worked together to make it the most special memorable day. In addition to their love and support our guests made a very kind donation to a tree fund which allowed us to invest in around 70 fruit trees that were planted on our 10 acre property as part of a sustainable future for our family. We planted many different varieties to perhaps to highlight a growing opportunity for our farm.
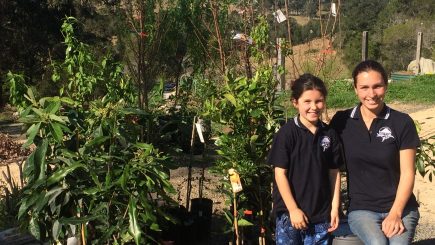
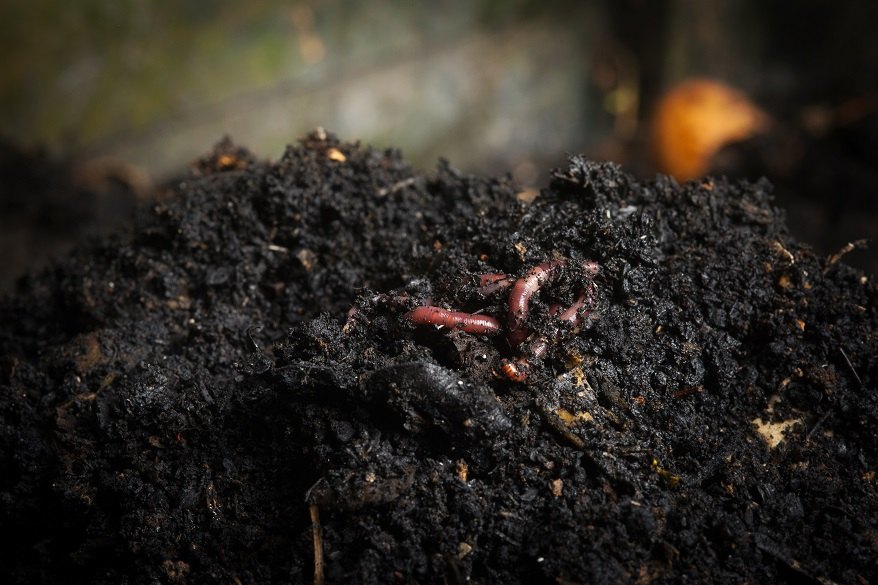
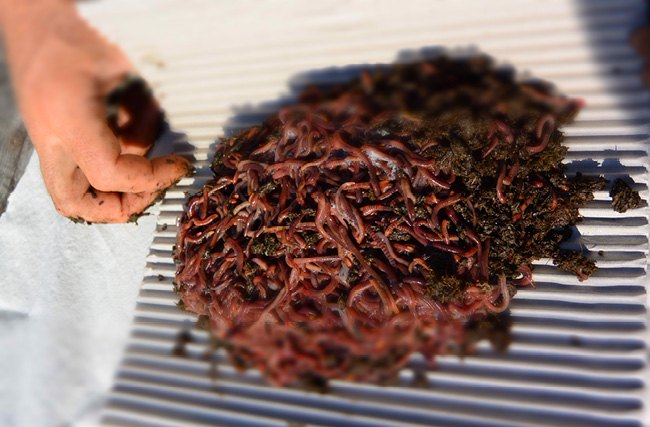
Running our business on the land the ‘fruits of our labour’ have come in so many forms. A fruiting tree to me seems one of nature’s biggest rewards and for seemingly limited input, just our will for it to grow, Well that has been our initial approach anyway! Every tree was planted lovingly accompanied by high quality worm castings made available to us from our worm farm.
we mass planted around 70 small trees, our 7 year old daughter was amazed as we told her what she could expect to receive from them in the future. Of course she asked how long it would take and was disappointed with our answer. How quickly time goes! Spring has sprung!
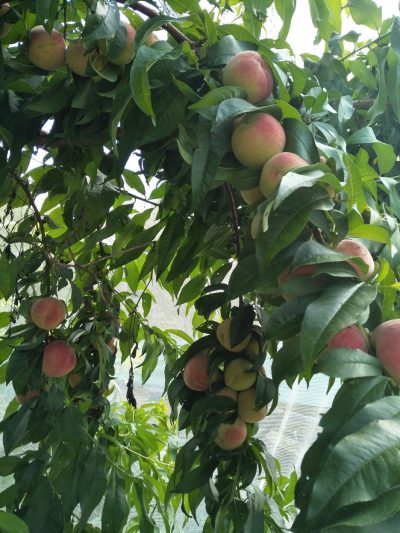
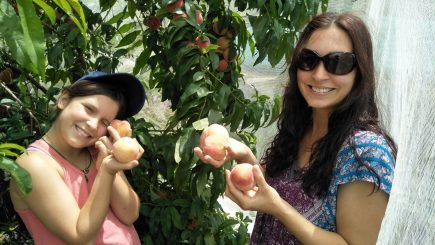
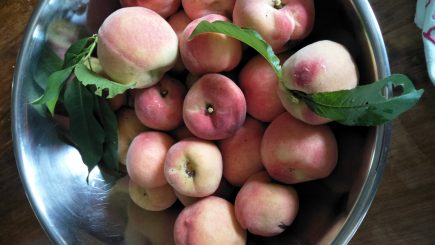
Unexpectedly the winner by far is the two tropical peach trees we planted beside each other for them to cross pollinate. They hit the ground running and quickly formed into large trees seemingly overnight. We watched as their glossy green leaves disappeared in Autumn and a twiggy skeleton remained that blossomed cute little pink flowers. Early spring healthy looking leaves returned followed by little green balls of hope. Both trees were laden with hundreds of fruit. Terrified of losing such a great gift to our family by insect attack, particularly fruit fly we completely netted both trees which worked well. We never spotted any fruit fly and only a few fruits were damaged by birds who cleverly got inside the netting. We were so excited to receive big sweet juicy white peaches with not a mark on them. We picked them when the skin was vibrant in colour and the fruit was slightly soft and smelt delicious! I wish there was a way we could share them all with you! They have been a proud addition to our lunchboxes, fruit platters and I have been particularly enjoying white peach flavoured kombucha!
Our citrus fruits were expected to take well and haven’t disappointed we have many green signs of fruits and are expecting a big harvest that I will be sure to report on.
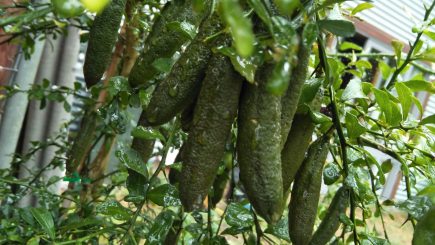
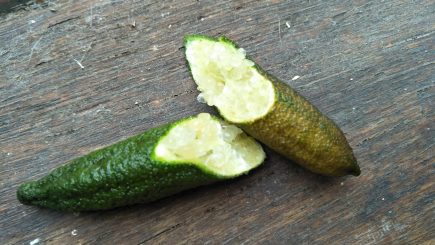
We decided to pot the Australian native finger limes best described as natures caviar and they have also done very well. They are still green for now but are of good size. We couldn’t help tasting one, the citrus bursts are quite bitter and taste very limey at the moment but we can tell they will be ahh-mazing!
It hasn’t all been this exciting. We have been very time poor this year, a new baby, booming business, extreme summer temperatures, drought and goat attack! The trees have mostly had to fend for themselves and some are no longer with us. See the list we planted below.
1x Macadamia, 2x tropical peaches, 1x Bush plum, 2x Pears, 2x Nectarine, 4x Finger limes, 14x Avocados, 2x Apricots, 3x Plums, 4x Apples trees, 6x Grape vines, 1x Kiwi fruit vine, 2x Navel oranges, 2x Mandarins, 6x Blueberries, 2x Blood Navel oranges, 1x Cherry tree, 1x Logan Berry, 1x Lime, 1x Tahitian Lime, 4x Arabica Coffee plants, 1x lemon, 1x curry tree,2x Davidson Plumbs, 2x persimmons
Harvesting worms can be easy – feed worms in one spot and keep taking them out as they come otherwise known as baiting. Or you can take the top inch of the feed layer out and use the sunlight to drive them down on to a piece of newspaper or the like also known as light separation. Rule of thumb – Try not to take more then 1/3 of your worms, otherwise it will take to long for the population to bounce back.
Harvesting cast – when it is time to harvest the cast, feed worms on one side of the farm. The worms will move over. Scrape the top inch of the feed layer off one side and place on the other side where feeding is taking place. Once you feel sufficient worms have moved over (will normally take about a week) then you are able to shovel the castings out. This is why I use slatted floors in my beds to make it easier to get all the castings. Once you have shovelled the castings from your farm then repeat the process for the other side. At this point it is good idea to place your forest mulch or larger quantities of manure then normal to trigger a mating response from your worms. Allowing for the next generation of worms to replenish.
Liquids and castings – the best way to add biology to the soil in my opinion is liquids as you are able to increase the quantity of beneficial microbes by building their populations up. Chasing biology from the cast in water with continuous airflow via an air pump or compressor. The highly oxygenated environment are the perfect conditions to colonise good bacteria’s, which ultimately feed the plants by eating other microbes and delivering their nutrients to the plants roots. That is why it is best to colonise your microbes in vast numbers for the best result. For the best results aeration for twelve hours before feeding your tea a fish or seaweed extract or some sort of high nutrient load and aerate for another 24-30 hours. Remember after the aeration process, it is best to use the liquids within a 24hr period to be on the safe side. The reason for this, if your colony has built up in such numbers, this may result in oxygen depletion from the sheer volume of bacteria’s in the tea, also if the food runs out then there could also possibly be a crash in your colony.
Soil drenching and foliar sprays – either work just as well, both require different dilution rates. You could never apply too much worm tea, unless it has become anaerobic. Getting the application rates right means you save time and money making the liquids in the beginning. My rule of thumb- grow so many worms you can never run out. Foliar sprays normally work best at water 10:1 tea and soil drenches you can add in concentrate or dilute out to 1:1. There aren’t too many rules if you’re making it yourself, try a few things and see what works. Observe and see.
Soil drenching will encourage growth beneath the soil and help condition the soil. This encourages larger predatory organisms including native earthworms to build up in numbers.
INCLUDES
250g approx 1200 LIVE COMPOSTING WORMS
1 bag superfood to give your farm the best start.
This Combination of Blues, reds and tigers is great value to boost any worm farm
This worm package is suited to any of the tiered tray farm systems such as: Worm Cafe, can O worms, Worm factory, the Vermihut, Hungry bin, CFT systems, compost piles and in ground worm farming.
Compost worms – Species: Tigers(Eisenia fetida) , Reds (Eisenia Andrei) and Blues (Perionyx Excavatus).
We have found that the best way to ship worms around the country, is to get them in the post on Monday. Packages normally take 2-3 days but can occasionally take five if outside the urban areas.
Note: If extreme weather is expected we will send a quick email to notify you of an alternative shipment date.
Unfortunately WormBiz cannot ship live worm products to Western Australia, Tasmania or the Northern territory, due to complications with quarantine, heat stress and long distance. We would however like to offer you access to the information provided by our website. please see link provided to purchase worms from within Western Australia and in the Northern Territory, please search locally.
Top 5 mistakes your worms will not like.
It is well known the benefits of worms in the garden and how important they have been for the creation of the soils that help this planet breathe, buffering the suns relentless rays. Every avid worm farmer has experienced a wide range of complications inside their loved worm farms. The excited worm farmer new to the game has an arduous journey of trial and error before the worms seem to hold up to their reputation as veracious eaters. The worm albeit a simple living creature, is quite complex in its connection with its environment. Sensitivity is how the worms defend themselves and when things are bad, the good side of worm farming is astonishing in a magnitude of benefits for you, your home and your planet. Everyone benefits from worm farming even the people that don’t do it.
The difficulties in worm farming can succumb to the quick sell of how good worms really are. Most people, myself included, for the most part of our lives we know nothing about worms and their little farms but we hear about how good they are. The idea of worm farming is easier than it sounds, well at least to do it properly. Here are my top 5 mistakes that are commonly made.
Worms are great – keep it simple and look after the basics and you’ll have pets that will work for you all the time and even when they are unhappy, they won’t bother you about it.
In ground worm farms – Utilising worms in your gardens. Worm towers have become really quite popular and are a great way of introducing your worms into the garden once your farm is established. What are worm towers you ask? With several products on the market such as tumbleweeds worm feast or birdies worm tower, there are many more DIY in ground worm farm designs available for free, mainly consisting of a cylindrical arrangement with an open bottom buried half way into your garden. This acts as the living arrangement for the worms and you feed the garden by feeding the worms inside the bucket. The reason why this actually works is there are many holes in the sides of cylinder or box allowing air flow up high, drainage down low and access into the garden soil for your worms. None the less they are still many benefits to this method of in ground worm farming and I highly recommend that this not be your main source of worm farming but may be complementary method of worm farming. Worms will leave the worm tower and end up in your garden and then perhaps end up back in your in ground worm farm. The benefits that reign supreme by this method are numerous so should be tackled by anyone wanting to maximise their effort. Let’s start with the limitations then head to the benefits. First if it is your only method of worm farming it is quite difficult to produce the amount of castings that is desired by the avid gardener which in retrospect avid gardeners can never have too many castings. Second even though your garden receives the beautiful rich leachate it is only accessible by the plants and soil directly around the worm tower. Thirdly the area in which you have to process food scraps is limited by how many you have spread throughout the garden, unless of course you have a large 60l garbage bin with holes in the side. Too many of these worm towers can start stacking up and taking valuable real-estate in your garden where plants could be producing. Some of the aftermarket worm farms look nicer and can be hidden more graciously amongst your plants then some of the DIY methods which are difficult to find lids and end up as a mini table in the middle of your garden bed. Now don’t get me wrong I love the idea of in ground worm farming and wouldn’t garden without them. But all too often people tell me about their wonderful in ground worm farm and that is all they do missing out on all the real benefits of home worm farming. Don’t make it a novelty let it be an extension to your amazing backyard garden system. So the benefits: the biggest one is that is the easiest form of worm farming ive come across. It is a cheap way to extend your worm farming capabilities. The garden directly receives your scraps and water which in turn becomes castings and worm wee. Creating an environmental habitat for other garden critters and native worms. Increase the population of your worms easy and effectively. All the benefits say that you should defiantly use in ground worm farms they are great way to maximise the work your worms do for you.