2200 Live compost worms + Book + extras

Post Type: Product

WORMS + BOOK with FREE express shipping

 THE WORMS

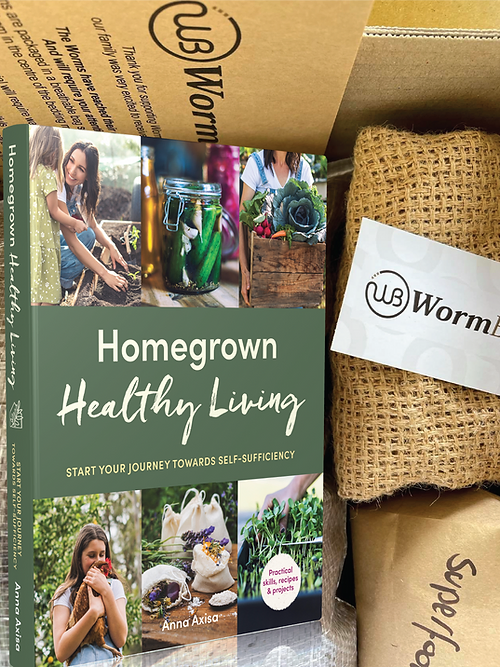
Get your Live Worm starter kit from Wormbiz with this combination package. The Premium Value Pack includes:

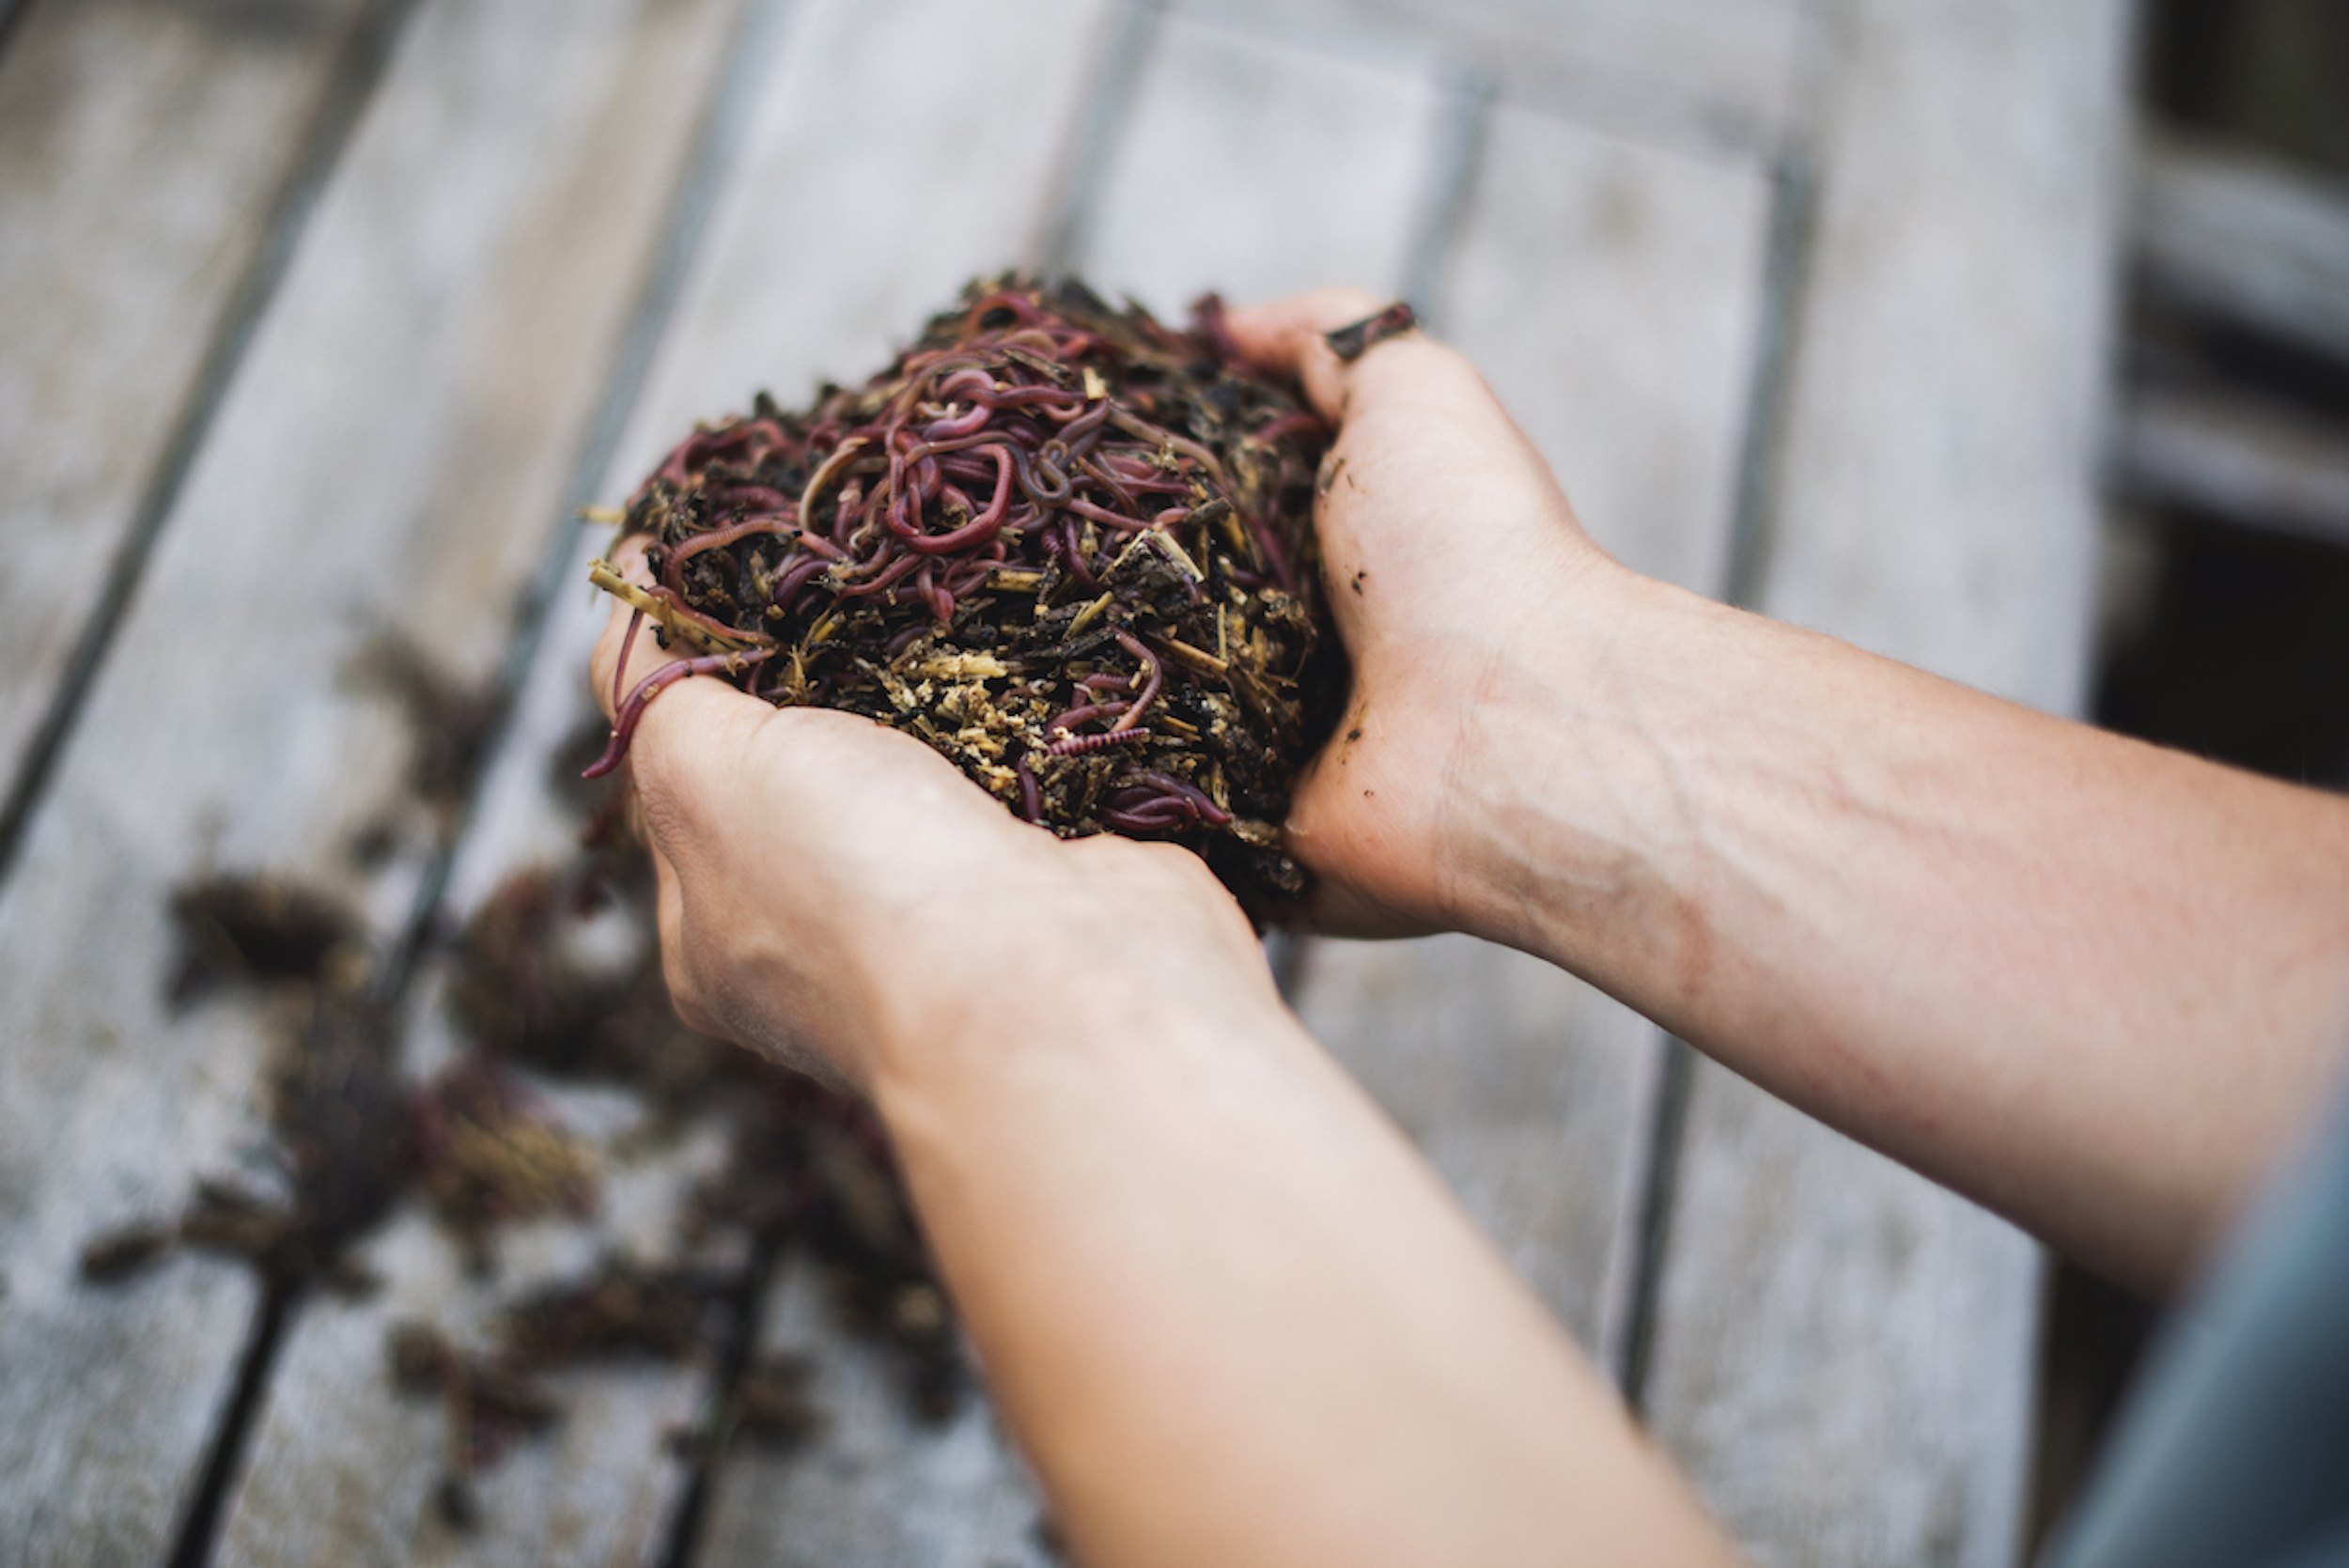
  • A massive 2200 live compost worms packed in quality bedding containing worm cocoons (eggs).
  • 1 bag of worm superfood to help the little guys settle in
  • 1 hessian worm blanket

*Worm farm not included

(All worm packages are express shipped via Australia Post on Monday’s)


THE BOOK

Ix copy of Homegrown Healthy Living

Start living your homestead dream today- no matter where you call home!

 Enjoy over 300 pages of tips, practical guides, recipes, and stories from my heart to yours.  Including how we became commercial worm farmers, modern-day homesteaders, and advocates for healthy regenerative living.

All the practical skills, recipes, and projects you need to get you going! Plus, a full worm guide to help you start and maintain your worm farm.

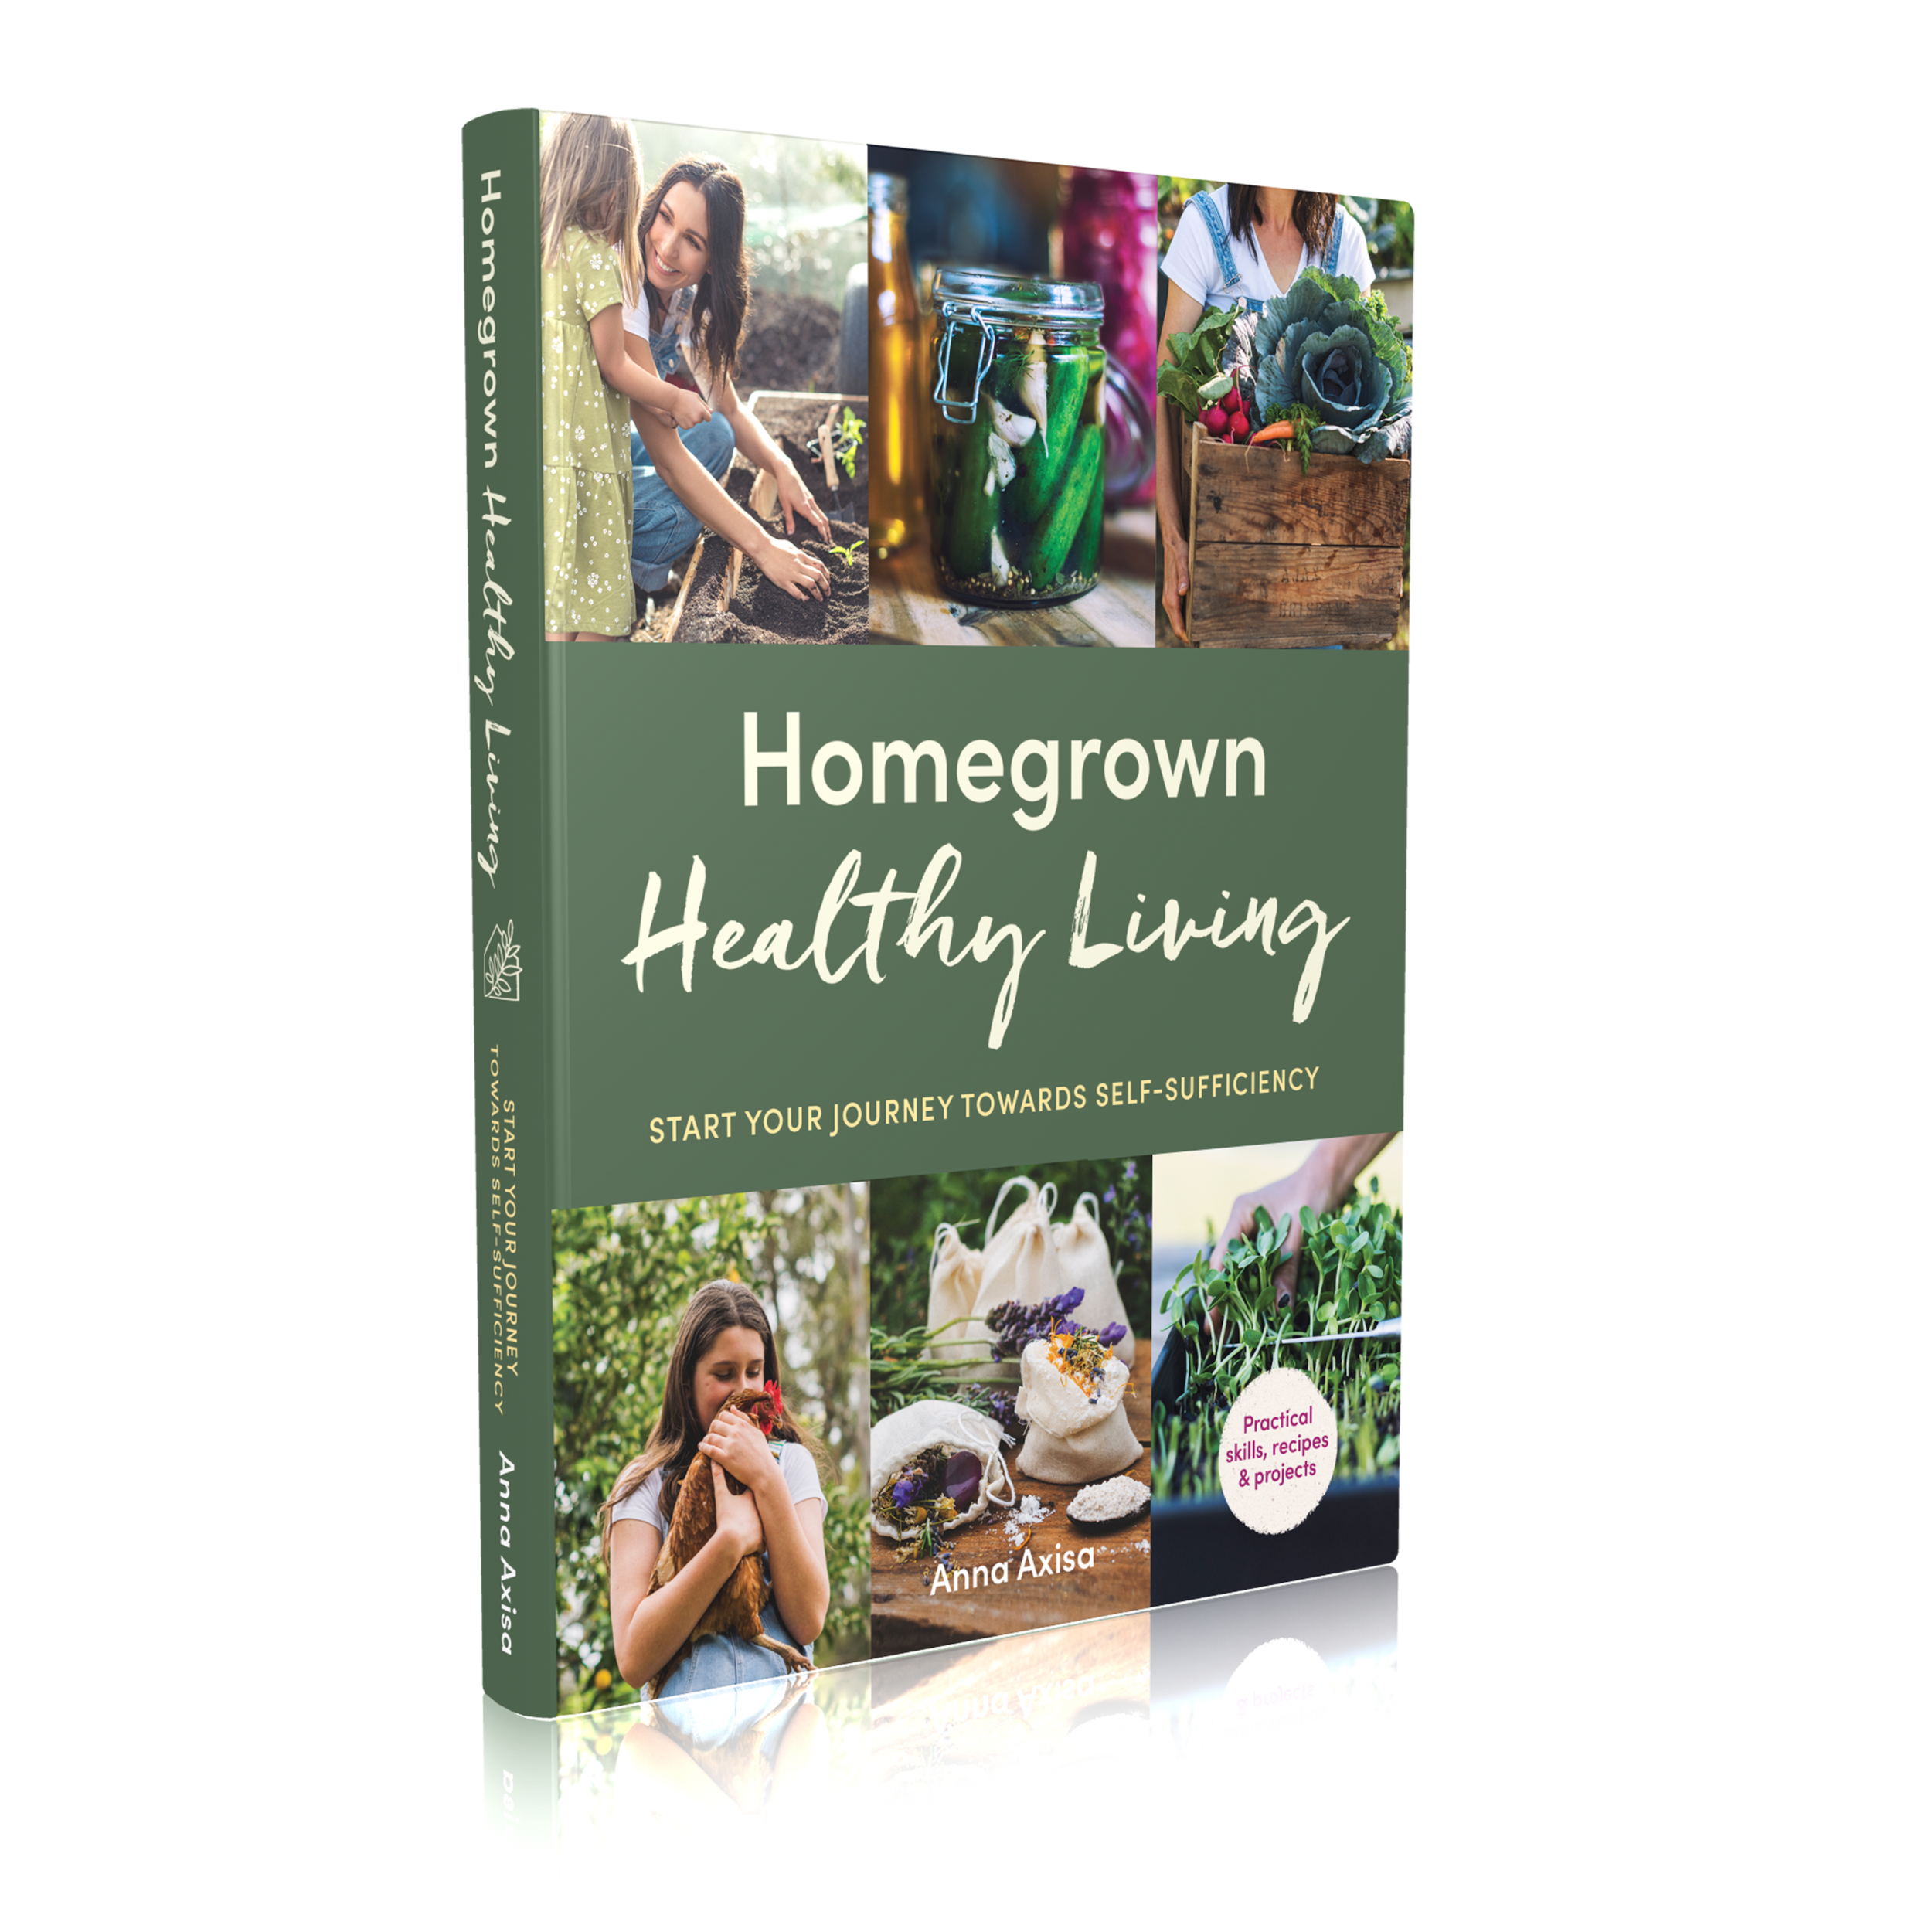
Homegrown Healthy Living book cover

Do you want to​

  • Learn practical tips and tricks for living your best homestead lifestyle anywhere with our simple step-by-step guides.
  • Make healthy soil in your very own backyard?
  • Work towards self-sufficiency, ditch the supermarket, and nourish your family with healthy food from your garden?
  • Live more mindfully and in tune with your values?
  • Form new healthy habits?
  •  Live by the principles of permaculture and increase your household resilience?
  •  Improve your gut health and boost your immunity?

In 7 wholesome chapters, you will discover:

  • 🌱Real stories of almost ten years of modern homestead living and my journey to good health after being diagnosed with a chronic auto-immune disease.
  • 🌱 Step-by-step guides to get you started growing your own food and creating healthy soil by worm farming and composting
  • 🌱 An Introduction to permaculture living and how you can apply it to everyday life for household resilience
  • 🌱 Over 40+ nourishing recipes for the whole family
  • 🌱How to preserve food through fermentation and improve your gut health
  • 🌱Simple recipes to make your own natural home and body products from items you will likely already have!
  • 🌱 Mindfulness and self-care ideas to improve your health and well-being by filling your cup so you can give from the overflow.
  • And lots more practical skills, projects, and recipes so you can get started on your journey towards self-sufficiency – no matter where you call home.

INSPIRE POSITIVE CHANGE THIS XMAS
All books are personally signed and gift-wrapped in brown paper with a jute twine bow.
If you would like to learn more, visit the Homegrown Health website.

600 Live compost worms

Post Type: Product

ORDERS SHIPPED EVERY MONDAY,  (If placed before before 4PM Sunday)

INCLUDES

125g approx 600 LIVE COMPOSTING WORMS

1 bag superfood to give your farm the best start or boost.

This Combination of Blues, reds and tigers is great value to boost any worm farm

We include a compost and coco coir mixture that is rich in microbes and retains water well for your worms to lay lots of cocoons in their new environment.

This worm package is suited to any of the tiered tray farm systems such as: Worm Cafe, can O worms, Worm factory, the Vermihut, Hungry bin, CFT systems, compost piles and in ground worm farming.

Compost worms – Species: Tigers(Eisenia fetida) , Reds (Eisenia Andrei) and  Blues (Perionyx Excavatus).

express post delivery included

Shipping information

We have found that the best way to ship worms around the country, is to get them in the post on Monday. Packages normally take 2-3 days but can occasionally take five if outside the urban areas.

Note: If extreme weather is expected we will send a quick email to notify you of an alternative shipment date.

Unfortunately WormBiz cannot ship live worm products to Western Australia, Tasmania or the Northern territory, due to complications with quarantine, heat stress and long distance. We would however like to offer you access to the information provided by our website.   please see link provided to purchase worms from within Western Australia and in the Northern Territory, please search locally.


1Kg Live compost worms FREE express shipping

Post Type: Product

I kg (approx 4000) LIVE COMPOSTING WORMS

This Combination of Blues, reds and tigers is great value to boost any worm farm

We include a compost and coco coir mixture that is rich in microbes and retains water well for your worms to lay lots of cocoons in their new environment.

This worm package is suited to any of the tiered tray farm systems such as: Worm Cafe, can O worms, Worm factory, the Vermihut, Hungry bin, CFT systems, compost piles and in ground worm farming.

Compost worms – Species: Tigers(Eisenia fetida) , Reds (Eisenia Andrei) and  Blues (Perionyx Excavatus).

express post delivery included

Shipping information

We have found that the best way to ship worms around the country, is to get them in the post on Monday. Packages normally take 2-3 days but can occasionally take five if outside the urban areas.

Note: If extreme weather is expected we will send a quick email to notify you of an alternative shipment date.

Unfortunately WormBiz cannot ship live worm products to Western Australia, Tasmania or the Northern territory, due to complications with quarantine, heat stress and long distance. We would however like to offer you access to the information provided by our website.   please see link provided to purchase worms from within Western Australia and in the Northern Territory, please search locally.


Homegrown Healthy Living- Start your journey towards self-sufficiency

Post Type: Product

Start living your homestead dream today- no matter where you call home!

 All the practical skills, recipes, and projects you need to get you going! Plus, a full worm guide to help you start and maintain your worm farm.

Homegrown Healthy Living book cover

Do you want to​

  • Learn practical tips and tricks for living your best homestead lifestyle anywhere with our simple step-by-step guides.
  • Make healthy soil in your very own backyard?
  • Work towards self-sufficiency, ditch the supermarket, and nourish your family with healthy food from your garden?
  • Live more mindfully and in tune with your values?
  • Form new healthy habits?
  •  Live by the principles of permaculture and increase your household resilience?
  •  Improve your gut health and boost your immunity?

In 7 wholesome chapters, you will discover:

  • 🌱Real stories of almost ten years of modern homestead living and my journey to good health after being diagnosed with a chronic auto-immune disease.
  • 🌱 Step-by-step guides to get you started growing your own food and creating healthy soil by worm farming and composting
  • 🌱 An Introduction to permaculture living and how you can apply it to everyday life for household resilience
  • 🌱 Over 40+ nourishing recipes for the whole family
  • 🌱How to preserve food through fermentation and improve your gut health
  • 🌱Simple recipes to make your own natural home and body products from items you will likely already have!
  • 🌱 Mindfulness and self-care ideas to improve your health and well-being by filling your cup so you can give from the overflow.
  • And lots more practical skills, projects, and recipes so you can get started on your journey towards self-sufficiency – no matter where you call home.

INSPIRE POSITIVE CHANGE THIS XMAS
All books are personally signed and gift-wrapped in brown paper with a jute twine bow.
If you would like to learn more, visit the Homegrown Health website.

How to make Great Compost

Post Type: Blog Post

There are many tools and methods to processing natural waste materials into this very powerful additive for your soil.
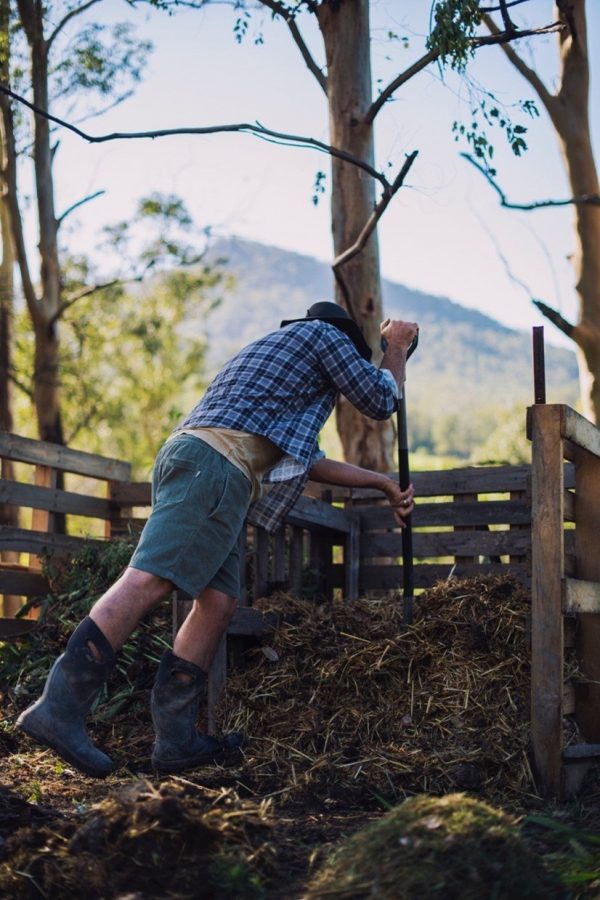
Successful composting is all about the right balance of ingredients and managing the right conditions for organic matter to decompose and return to the soil, just as they do in nature. There are lots of ways you can make compost at home from natural waste materials, depending on your chosen method, volume and how quickly you would like to achieve the finished result. Making compost can be quite labour intensive and time consuming or fairly simple. Finished compost is dark and rich in colour with a pleasant, earthy smell and is easily applied to the garden by working it through the soil or blending through seed-raising or potting mixes. Regardless of your living space there are a variety of options to enable you to easily compost at home.

Composting is all about creating the right balance of ingredients and conditions.

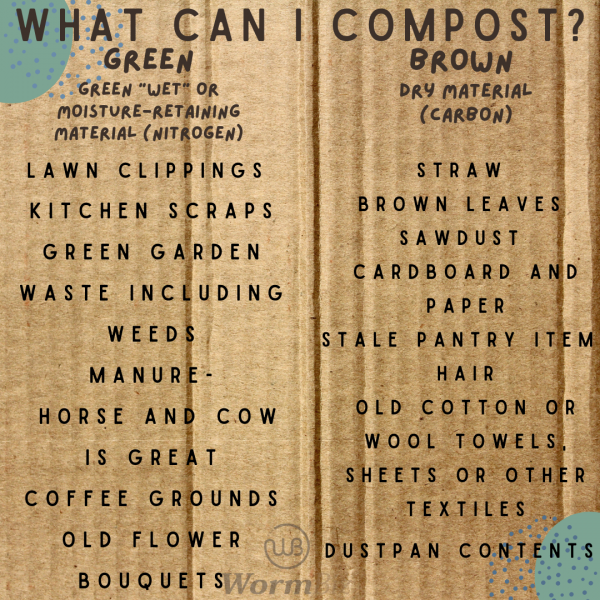
Carbon includes brown or dry materials,

Nitrogen includes green or moisture retaining materials,

Oxygen or aeration aids the decomposition process and can be achieved by turning, forking or tumbling,

Moisture in the right amounts to maintain activity without being too wet and causing anaerobic (no air) conditions,

Bacteria and Fungi help break down material and help to decompose woody material.

With the right mixture of carbon, nitrogen (50/50 ratio), oxygen and moisture, bacteria and fungi micro-organisms are activated, creating high heat which speeds up the decomposition process from organic matter into compost. Active management of the pile through turning (aerating) and the right amount of moisture is required to maintain a high temperature until the materials are all broken down.

The squeeze test for moisture

A good gauge for adequate moisture is to squeeze a handful of material. You should see water well up around your fingers but not really run off; more drip, similar to a damp sponge. If too moist and soggy, incorporating more carbon (brown) material will help to rebalance. If too dry, add water for moisture.

What can I compost?

There is a long list of items suitable for the compost, the general rule is if it came from a natural source, it is suitable for composting. A 50/50 ratio of carbon and nitrogen, with adequate aeration achieved by turning and the appropriate amount of moisture, dependent on the method you are using.
Some methods to make great compost include:

Thermolytic Compost (Hot method)

A compost heap or bay is a very effective way of processing larger amounts of green waste and/or including food waste materials and therefore creating a larger  volume of finished compost. Perhaps you might only make a heap a couple of times per year by gathering a large amount of compostable materials. We like to do a heap pile timed at the end of a growing season, as that way we can use all our garden pruning’s and leftovers in addition to timing this with the cleaning out of our soiled animal enclosure bedding. You will require outdoor ground space of at least 1 metre square; old pallets make for a great compost bay and help to keep the heap contained and heaped to an ideal size of 1 cubic metre which helps sustain heat the whole way through the process. Choose a site close to your garden with good drainage and summer shade. Create layers with your materials a bit like a lasagna, remembering the 50/50 greens to browns rule. Turning for aeration is best achieved with a compost fork and added moisture as required. Remember, a good gauge for adequate moisture is to squeeze a handful of material; you should see water well up around your fingers but not really run off, it should more drip, similar to a damp sponge. If too moist and soggy incorporating more carbon (brown) material will help to rebalance. If too dry, add water for moisture. The process will take around 6 weeks, finished compost is dark in colour and smells earthy. There may still be larger materials present in your pile. Sift these out or use as is.

Composting in situ (Cold method)

This method is about intentionally composting to build soil in an area you intend on being productive in the future. The advantage of this method is the low labour input although composting in situ is a slow or “cold” decomposition process. Using a variety of drag and dump materials is best including woody debris, pruning’s and other green waste materials, as this will ultimately bring in a diverse range of organisms to break down the pile over an estimated period of about a year. Composting in situ doesn’t require added moisture as such, however a hose every now and again in dry periods will help to speed up the process. It is important to note with this method that any weed seeds present won’t get sterilised like in a hot compost, therefore it is possible for the pile to reshoot unwanted vegetation. If this occurs, the new vegetative growth can be pulled out before harvesting the finished soil from underneath the pile.

Compost bin

Compost bins are a great way to compost garden green waste and food waste materials. There are lots on the market and also plenty of DIY options, however they all work in a similar manner. Compost bins are a large vessel slightly dug into the ground with an opening at the top and a lid. Organic waste materials are deposited via the opening at the top. Compost bins are generally low maintenance, although you do have to turn the contents over with a shovel or compost turner regularly to maintain aeration and add moisture as required. Once the composting process has completed the bin is lifted up and the compost is harvested.

Compost tumbler

Rotating compost bins are a user-friendly way to make small batches of compost from garden and food waste materials in a fairly fast time, due to adequate aeration and rotation. Compost tumblers vary in size and shape, but they all work in much the same way. The compost process time is reduced due to the ability to mix your compost easily and thoroughly. Rotating compost bins allow for adjustable airflow which is great to monitor oxygen control. Look for a tumbler with dual chambers to allow for continuous composting. One side can be processing while the other side is available to deposit further waste materials. Emptying is easy by opening the chamber and turning upside down to collect.

Solar composting

A solar composter or digester sometimes known as a “green cone” is maintenance-free, no turning or moisture required. A great solution to dispose for all household organic waste including meat, dairy and even pet waste. Green garden waste is not recommended as it takes up too much room and clogs the system. The cone is positioned in the garden and buried about 40 cm into the ground. Waste is deposited through the opening at the top before closing the lid. It is a simple, low-maintenance composting unit into which you can throw all household organic waste for it to return itself to the soil. It doesn’t produce a compost that can be harvested and utilised elsewhere but does break down waste material until it becomes rich liquid, which then filters safely into the surrounding soil.

Bokashi Bin

Bokashi is a Japanese term meaning – “Fermented organic matter”

A bokashi benchtop or under-sink bucket style system is a great option for apartment dwellers or anyone with minimal space and time that doesn’t have an alternative solution for diverting their food waste from landfill. This system is effective at breaking down kitchen waste material and allows you to deposit almost all of your scraps inside, turning them into a liquid fertiliser and eventually compost once buried in the soil. The process can be a bit icky until you get the right balance and routine. The scraps deposited in the bin first go through the process of fermentation. This is achieved and accelerated by introducing a specific store-bought beneficial bacterium. Each time scraps are added to the bin the new layer is sprayed with the accelerant or grains to be applied over the top. Fermented food waste is good organic matter with high nutrient content and will eventually be buried into the soil where it will complete the composting process. Along the way the fermented juice can be collected via the specific tap featured by the bucket. When diluted this “juice” is a rich fertiliser for indoor and outdoor plants or can be safety poured down the drain which is an excellent drain cleaner. A bokashi bin is best kept inside but can be housed outside if kept in full shade out of direct sunlight.

How do you use a bokashi bin?

A bokashi bin is fairly easy to use once you get into the swing of it! You can purchase different size buckets depending on the volume of your kitchen waste stream. Bokashi buckets are mostly plastic with a lid, a grate at the bottom of the bin to separate the juice and a tap to drain liquid easily. The bucket is best kept indoors, however can be left out if in a shaded protected position with the lid firmly closed to prevent undesirable pests and insects.


The process goes a little something like this

Open the bin lid and deposit food waste material. You can put almost all food waste inside except large bones, liquids and already moldy food.

Spray or sprinkle bokashi mix (grains) over each waste deposit. For every cup of food waste, it is around 1 tablespoon of mix or 3-5 sprays of accelerant.

It is important to eliminate air pockets within the waste layers and so it is recommended after each deposit to press material down firmly to remove air bubbles. A potato masher is a great tool for the job! Ensure lid is closed properly and tightly.

Food scraps inside the bin are technically not “composting” but rather going through the process of fermentation which creates “Bokashi juice”. This liquid is full of beneficial plant nutrients and collects at the bottom of the bin after about the first week of use and can easily be emptied via the tap. Drain juice often to enable the material to decompose quicker. The bokashi juice will be orange in colour and smell like vinegar. It will have white fungal threads floating in it or have a thin white coating. Putrid smelling juice should not be used to fertilise plants, and it is best to dispose of this juice by pouring it down the drain. The bokashi bucket will need to be regularly drained, usually every few days, however more liquid will be generated in warmer weather. Diluted juice can be used to fertilise indoor, outdoor and potted plants A ratio of two teaspoons of juice for every litre of water. It is best not to store liquid for more than 1-2 days as it can quickly turn rancid. You can also add the juice to your compost pile or safely dispose of the juice undiluted down the drain, where the beneficial bacteria will act as natural drain cleaner.

Repeat this process until the bokashi bin is full. Once full, it is best to let it continue to ferment for another 1-2 weeks before burying. Having two bokashi bins allows the user to start a new bin for food waste collection right away while the first bucket is finalising before its contents are finally disposed of by burying in the soil.

Wash your bokashi bucket out after each use using a natural cleaner or plain water. Harsh chemical cleaners are not recommended.

How do you bury the material?

There are a few options available when it comes to burying the bokashi bin waste. The first is to dig a hole in your garden about 25-30 cm deep, the deeper the better. The compost is acidic when it is first buried but neutralises after 7-10 days. It is best to wait 2 weeks before planting anything in the same location. In an established garden, dig around plants, keeping away from the roots of young plants. Tip the waste in the hole and cover it up with soil.

If you don’t have any garden, the contents of your bokashi bin can be buried in a large tub of soil. This will turn into compost which can be used to nourish pot plants or could be offered to friends, family or neighbours for their gardens. Alternatively, some councils have regular organic waste pick-up, so get in touch with your local council to find out what their solution is! Community gardens may also offer bokashi waste drop off.

It is definitely worth mentioning, if none of the organic waste home processing options are right for you, do some investigation to find out who might be interested in your unprocessed waste. For example, perhaps you could drop off your food waste to the local community garden for composting. A good option strategy would be to freeze until viable to make the trip.

What can I put in a bokashi bin? Any organic waste materials cooked or raw, such as meat, dairy, vegetables, fruit, meal scrapings, breads, coffee grounds, and compostable tea bags.

What not to include? Food that is already rotten, plastic bottles, plastic wrapping, glass or any other non-compostable materials.

Source: Home Grown Health, Anna Axisa.

Available for pre-order soon!

Join the Home Grown Healthy Living Facebook group to stay up to date!

Introducing Anna’s Next Chapter!

Post Type: Blog Post
Home Grown Health is Anna’s Publishing debut.

Before we introduce the project, here is a bit of background.The WormBiz family live on a 10-acre mountainside in the Manning Valley, NSW Australia.

In 2014 they purchased an off-grid property with no infrastructure or services. Shortly after that, they took on a rundown commercial worm operation. Peter and Anna had no prior experience in vermiculture, (worm-farming) only the desire to work in harmony nature and what they thought they knew about living on the land.

After countless hours of researching, trialing and failing! Worms quickly became their passion. It has not always been easy, especially when starting out with little but our dreams, however having learnt the ability to readapt with feedback we gained from failing which it has always led to success in one way or another.

There was something humbling about going without. Camping under a tarp for months while working on a new enterprise until the home site was excavated and eventually constructed. Solar shower bags, dug-out toilets, lights run off old car batteries and ice-filled eskies. The family “re-wilded” together and developed a love for a back-to-basics life of voluntary simplicity.

In 2016 at age 26 Anna diagnosed with a chronic immune disease and from then the WormBiz family adopted a “food as medicine” approach to daily life and were grateful to the worms for producing fertile organic soil to grow nutrient-dense, clean food as a priority. The compost worm business has slowly but surely begun to flourish, and in return allowed Peter and Anna to transform a once seemingly unusable mountainside into a resilient landscape full of abundance. They are passionate about sharing back-to-basics lifestyle principles and stories of their homestead adventures with others.

Anna has her very own book launching soon titled “Home Grown Health” and what better time than in today’s ever-changing new world!

Be a part of the Home Grown Healthy Living Community

As the pages of the book continue to come to life, I am excited to invite you to join a new online group celebrating living well!

Home Grown Healthy Living. “A friendly community sharing modern-day homesteading ideas for optimal health and wellbeing.”

Discover creative ways to be self-sufficient and gain inspiration to reconnect with natural ways of living to experience your best homestead lifestyle anywhere.

The group will focus on nourishing ourselves and our families, naturally.

Suggested topics include organic gardening, permaculture, holistic management, wholefood recipes, home herbalism, natural homemade products, low tox home alternatives. Homesteading and off-grid living no matter where you call home.

This safe space will also provide a welcome opportunity to share our trials and triumphs along the way! We are so excited to share this supportive space and inspire each other to live well today!

Please feel welcome to invite others you think may like to join.

Click here to join the Home Grown Health Living Online Community.


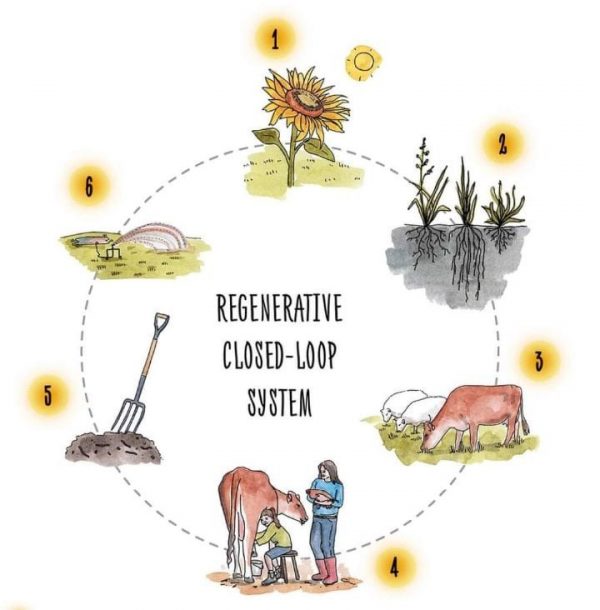
A practical guide to Regenerative Closed-loop Systems

Post Type: Blog Post

How we live by permaculture day to day began with small steps and an emphasis on creating and sustaining regenerative closed-loop systems, for example, taking responsibility for our food waste.

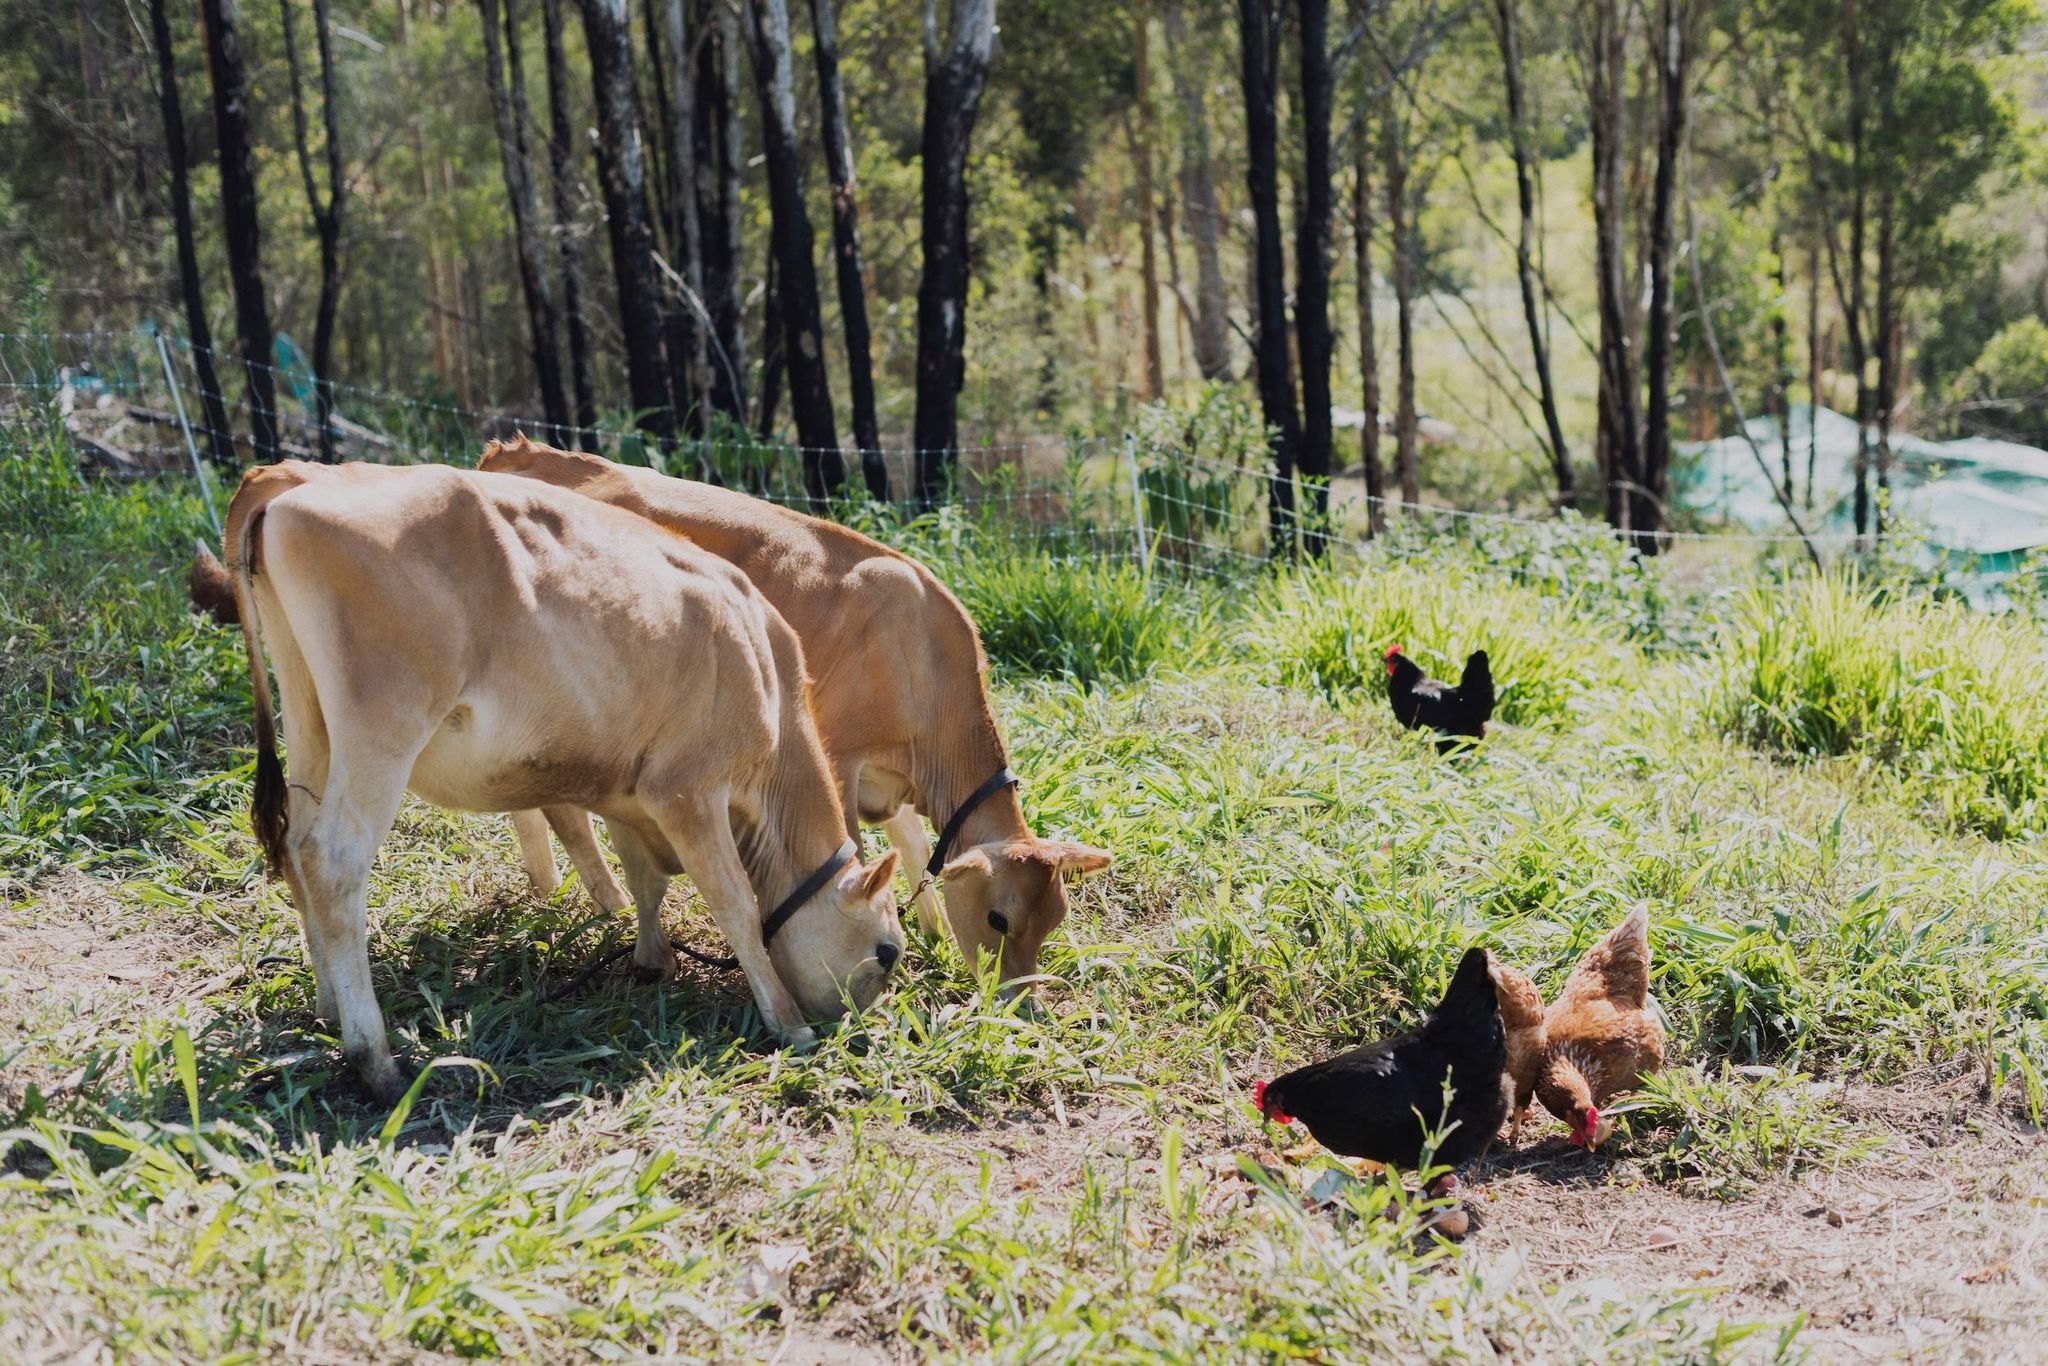
Kitchen scraps go to the chickens and turn into both eggs that come back to the kitchen, and manure that cycles through the garden soil and fertilizes next season’s food crops. Rotational grazing of our animals ensures good animal health and regeneration of the landscape.

Nature restores itself by accessing its own natural inputs required to regenerate, yet often we overlook these and take what is there without giving back, disrupting nature’s natural cycle.

Closing the loop means thinking holistically and changing our traditional mindset of “make, use and dispose” and instead considering how we can manage and feed back into the system, preserving nutrients to sustain and regenerate in order to achieve productive outcomes for plants, animals and humans.

This means mimicking nature rather than dominating it.


illustration by Brenna Quinlan

  1. Capture, convert and store sunlight into energy through photosynthesis

  2. Regenerative, diverse growth of plants and grasses.
  3. Rotational grazing of multispecies livestock to manage, cycle and stimulate plant growth. Animal diversity also helps control parasite life cycle and provides a variety of fats and proteins.
  4. Provide family with meat, eggs and dairy. Surplus produce such as whey contribute to the sustainability of other farm animals including pigs and chickens.
  5. Manure deposited directly on pasture feeds soil life. Nutrients collected in animal housing are composted for vegetable production.
  6. Nutrient-rich water from worm operation irrigates grazing and food producing terraces.

We make good use of renewable resources such as solar energy and recycled water, plus a composting toilet creating nutrient-rich fertiliser returned to the soil as fertiliser for our fruiting trees. Growing compost worms on a large scale has allowed us collect and compost food waste from commercial establishments on our farm and to teach people about composting and worm farming through workshops and engagements. Living and forming a strong relationship with the hillside, our homeland and community, the momentum started to build, sometimes a little too fast but the yields we have been rewarded with have always reassured us we are on the right path for our family.

WHAT TO FEED THE WORMS? Your questions answered

Post Type: Blog Post

What to feed your worms? What not to feed your worms?

How much can they eat?

These questions haunt all new worm farmers. Fear not, here is all you need to know when feeding your worms so they produce large amounts of worm castings.  More castings helps you to grow bigger, healthier organic food at home!


What are the best foods to feed my worms?

Worms don’t actually ‘eat’ food scraps but instead feed on the bacteria and fungi that covers food waste and other organic matter to break it down. The decomposition process occurs at different rates depending on the food source.

Fruit and vegetable scraps – work well; ideally cut them up small, so they break down faster.

Cereals, grains and carbohydrates – work well, either cooked or uncooked.

Manures and compost – organic materials such as cow and horse manure and compost already contain large amounts of organisms so the worms can process more, faster. However, be careful not to feed your worms manure from animals that have received deworming treatment in the two weeks prior to manure collection.

What foods do worms not like?

There are some types of foods that worms don’t enjoy as much and can take much longer to break down, becoming problematic in your worm farm. They can become smelly and could encourage unwanted visitors such as blow-flies or vermin and put the farm out of balance. If you farm does turn ‘sour’ remove all food, and mix up the remaining material in the tray with your gloved hands. It can also be helpful to apply a sprinkle of lime or worm farm conditioner. Recommence feeding with more suitable materials.

Onion – Onion is on the bottom of the worms ‘favourite food’ list. Small amounts are OK, but too much can turn a worm farm acidic and unbalanced.  Therefore it is best to avoid.

Citrus – Takes a long while to break down and worms find it difficult to process. Citus is best in the compost or dry peel and use for tinder.

Dairy – It is possible to feed a worm farm small amounts of dairy, however it works best diluted with water. For example, yogurt diluted with water and poured over worm material. This helps disperse the high protein and fat evenly so the worms can eat it before it has a chance to turn off.

Meat – It is possible to process a very small amount meat in a worm farm, however it does take time to break down and you would need to bury it deep under the soil in the trays to discourage blow flies and ultimately maggots… eww! For these reasons it is probably best to avoid altogether.

How much can worms eat?

The generic answer is worms can eat up to half their own body weight every day although this depends on the type of food they are eating and how often are they being fed. You will learn how much they can eat as you become familiar with your farm. Checking on your worms every couple of days when starting out is the fastest way to learn what your worms do and don’t like. It will take several weeks for your worms to establish themselves in their new environment and process waste to their full potential. It is always a great sign when you see a bunch of worms balling up or congregating around the food source.

How much should I feed my worms?

When starting out a worm farm, about 250 grams or two handfuls of chopped food scraps every couple of days is recommended. It is a good habit to sprinkle a small amount of compost, soil or straw after each deposit. As your worm population grows, the amount of food you can feed also increases. A worm farm working at full capacity with high numbers should be expected to process 2-4 kgs of food waste every week.

How can I help the worms eat more?

Chopping the food scraps into small pieces and spreading it evenly over the surface instead of dumping it in a large heap, and keeping the farm moist but not too soggy makes for the ideal environment. A worm blanket is also helpful as it creates a darker environment to encourage the worms to come to the surface and feed. This could be made out of a moist thick piece of cardboard cut to size or a some hessian material such as an old potato sack. Giving the worms more area to feed in is another great way to process more waste; you can do this by simply adding a second feeding tray or having additional worm farms. Alternatively, you could also use an in ground worm farm to supplement your primary worm farm. There are a variety of different ways you can extend your worm farming success and process more waste material. Why not try up-sizing your farm to a DIY bathtub?

What happens if I over feed my worms?

Your worm farm could become smelly and you might find evidence of fly larvae (maggots).  Some foods are high in energy and when breaking down release that energy in the form of heat through a relationship with bacteria.  As the populations grow, more energy is consumed, resulting in a bi-product, heat.  When food is clumped together and is not spread in a light even pattern then worms have problems eating so much food before the heat sets in and then worms can’t eat it.  Once the temperature exceeds 35°C worms are in survival mode and often leave the area where the food and heat is. During winter this can be an advantage, as the increased temperatures suit the colder conditions. If there is to much food, remove excess and mix up the material in the tray. Add some moisture and straw material.

How do I manage the lime and pH levels?

Feeding food scraps to the worms causes the pH to lower. An unbalanced farm can become smelly and icky for you and the worms. This can be managed by adding carbon in the form of leaves and mulch or by adding a sprinkle of lime or conditioner when feeding your worms.

We hope this has helped! All of this information and more can be found at our Worm Help Centre.

Does your worm farm need a boost? visit our worm store and we will send you some wigglers in the post, free shipping! For an extra $10 off use worm10 at the check out

Our very best wishes for your worm farming journey!

Sign-up to our monthly newsletter for regular

tips and resources!

eNewsletter Signup

1 2 3